
One maintenance item we probably don’t think about too often or sometimes not at all is the RV sewer vent. I wanted to take a few minutes to talk about the vent and the possibility of replacing the RV sewer vent cover.
An RV vent cover performs an important function believe it or not. This vent allows your RV’s plumbing system to work effectively and also helps to disperse holding tank gases and odors. Besides, it will not take long for you to notice if it is clogged.
Luckily for you, cleaning the vent and replacing the vent cover is a straightforward task that you can easily handle right in your driveway or even at the campsite. Here are a few tools you will need for replacing your RV sewer vent cover and making sure it is sealed back up. So, just take your time and it will be much easier than you might think.

Needed Tools
- A plastic putty knife (a sharper metal knife can cause unwanted damage)
- A handheld screwdriver
- An electric screw gun/drill
- RV sealant, such as Dicor, and caulk gun
- Mineral spirits to clean and prepare the surface
- Paper towels
- A dry rag
- A new sewer vent cover (if vent replacement is needed)
Therefore, having all your tools ready ahead of time will make the task go faster.
Know your rigs roof type
Always make sure when applying a sealant on the roof of your RV, it is the correct type of sealant for your roof. Not all RV roofing materials are the same as the next. An RV roof can come in many forms such as rubber, aluminum, or fiberglass. So, as you can see, the sealant needs to be one that adheres properly to your type of roof coating.
How do I know if my RV sewer vent is clogged?
A few signs that your RV sewer vent is Clogged
- Slow-draining water in sinks/showers
- Unusually waste smells, especially during use.
- Gurgling sound as water drains down the pipes/drains.
- Slower than usual draining of holding tanks
Undoubtedly, you will see the signs if you look closely.
Step by Step
The Step by Step replacement instruction below is from the RV Geeks – Please visit their YouTube channel. They provide tons of great videos for the RV enthusiast @ RV GEEK YOUTUBE.
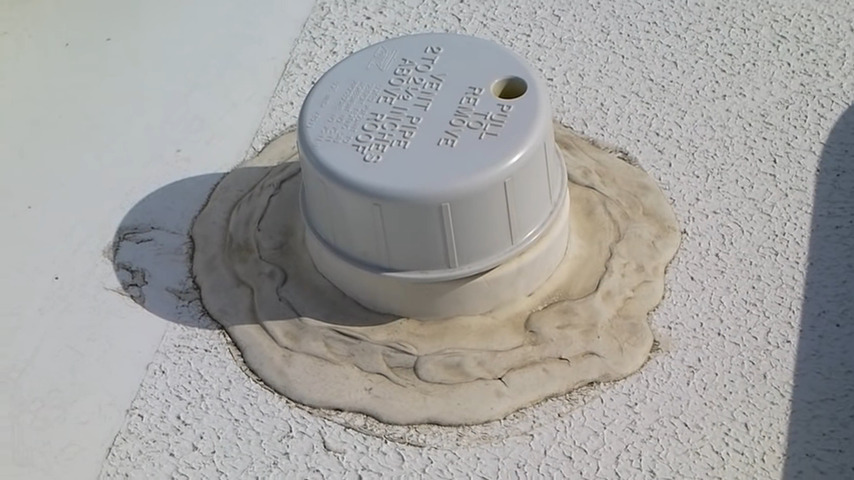
- Remove the old vent cap, which is usually held in place by a single Phillips-head screw.
- Use a putty knife to cut through the old Dicor, exposing the screw heads.
- Use your screwdriver or cordless drill to remove all of the screws (old traditional vent caps generally have six).
- Use your putty knife to lift and cut the old Dicor away from the roof. Note: Your RV roof could be fiberglass like ours, in which case it’s practically indestructible. But if you have an EDPM or TPO roof, commonly known as “rubber roofs,” be careful not to cut into the roof material with your putty knife… or use a plastic putty knife to be safe.
- After physically removing as much of the Dicor as you can, clean off the rest using mineral spirits. Again, if you have either type of rubber roof, use the mineral spirits sparingly… because soaking EDPM or TPO with mineral spirits could loosen/dissolve the underlying adhesive. Hence, this could potentially cause the rubber to separate from the roof.
- If necessary, and if you’re upgrading to a 360 Siphon Vent, use your hacksaw to trim the vent pipe down to ⅝-inch or less. Make this cut above the surface of the roof. So, skip this step if you’re doing a direct replacement of your old, standard RV plumbing vent.
- Take the small roll of sealing tape from the 360 Siphon package and remove the backing from the tape. Press it into place all the way around the base of the new vent.
- Insert the included round collar into the vent pipe far enough to allow the 360 Siphon to sit flush.
- Using the screws you removed from the old vent, reattach your new vent. Note that the 360 Siphon has only five screw holes. If the old screws were self-tapping, you should have no trouble drilling them into place. So, even though the holes very likely will not line up with the old screw holes (which is not a problem!). If your old vent cap didn’t use self-tapping screws, you might need to buy a few at the hardware store. Also, be careful not to over-tighten the screws.
- Put a thick bead of Dicor around the base of the vent, being sure to cover the screw heads completely. So, take your time as this is important to avoid the potential for leaks.
Replacing RV sewer vent and cover
Replacing RV vent and cover
The above video was made by the RV Geeks and shows how to replace a plumbing vent cap. So, please visit their YouTube channel for tons of great videos for the RV enthusiast @ RV GEEK YOUTUBE.
Sun and age can lead to cracked plumbing vent covers on the roof of an RV. Installing a new vent is a quick easy job, completed with just a few simple tools.
Older-style roof vents may not match replacement vents, which makes it impossible to simply snap a new cap onto an older vent base. So, this means having to replace the base, even if it’s in good condition.
A little Dicor (readily available from Camping World or the RV parts & service facility) will seal the new vent. ensuring that your camper stays dry.
This is a quick, easy repair, completed without special skills in under half an hour. A new roof vent cover currently costs about $3, and a tube of Dicor should be about $10 at your local camping store.
Recent Posts
So, check out some of our other helpful blog articles
50 Most asked RV questions and the answers for them
All you need to know about your RV propane tanks
RV Insurance coverage you should know about

Imagine
Close your eyes for a moment and just think about this. It’s sunrise, and you roll out of your RV, morning air feeling brisk, fire from the night before taking its last breath as it’s trying to reignite. You find your favorite chair on the site, turn it to look out over the lake, and nestle in to relax. Birds chirping and fish jumping as the new day begins. This is what it’s all about!………. Now imagine a hot cup of coffee in your hand. Life just got so much better!
So, Get out there and enjoy what this country has to offer.