Water Damage?
One of the scariest and most common problems when purchasing a used class C RV is water damage. Then comes that fateful day when you find out you need to start rebuilding the cabover bunk area. Not what you are wanting to find when you just spent good money on an RV that for all intents and purposes looked to be well taken care of.
I am going to try and walk you through my class c motorhome over cab repair the best I can. Writing a blog article about it was an afterthought, but luckily I did get some pictures as I was working on it.
Water penetration in the RV cab-over is very sneaky and hides well until there is major damage done that requires a complete rebuild job.
What is a Cabover Bunk?
The cab-over bunk is the overhang commonly seen on most class C RVs. This area protrudes out over the cab and may have 2 or 3 windows on older models. Most of the newer models are straying away from window installations there due to the water penetration nightmare.
The bunk-over cab design provides RVers with an additional place to sleep, thus making it the perfect option for families who might need extra space for people to sleep.
Some models still have the space, but it is replaced with storage and/or an entertainment center.
How much weight can you put in an over bunk?
Most class C manufacturers have a weight rating of between 300-700 pounds on the over-cab bunks. There should be a weight rating sticker on the front of the bunk unless it has been removed.
I am not sure structurally how they hold that much after looking at how mine was built. I definitely would not try and push the limits of their ratings.
Why do most Cabover Bunk areas leak?
The main reasons are poor design and lack of regular maintenance. Seals and seams need to be regularly checked for cracks and tears for them to properly keep water from penetrating your RV.
You have to remember that as you are driving down the road, the cab over is taking the brunt of any wind, rain, or debris coming your way. Water alone is bad enough, but when using the force of wind it is unstoppable. If there is a crack, hole, or tear, it will find it.
What supplies do I need for this project?
I have created a list of the supplies I used for my project. You may not need all the items I purchased depending on your game plan for fixing the over bunk. Feel free to browse through and you might find out most of these items are in your garage already.
Needed Supplies
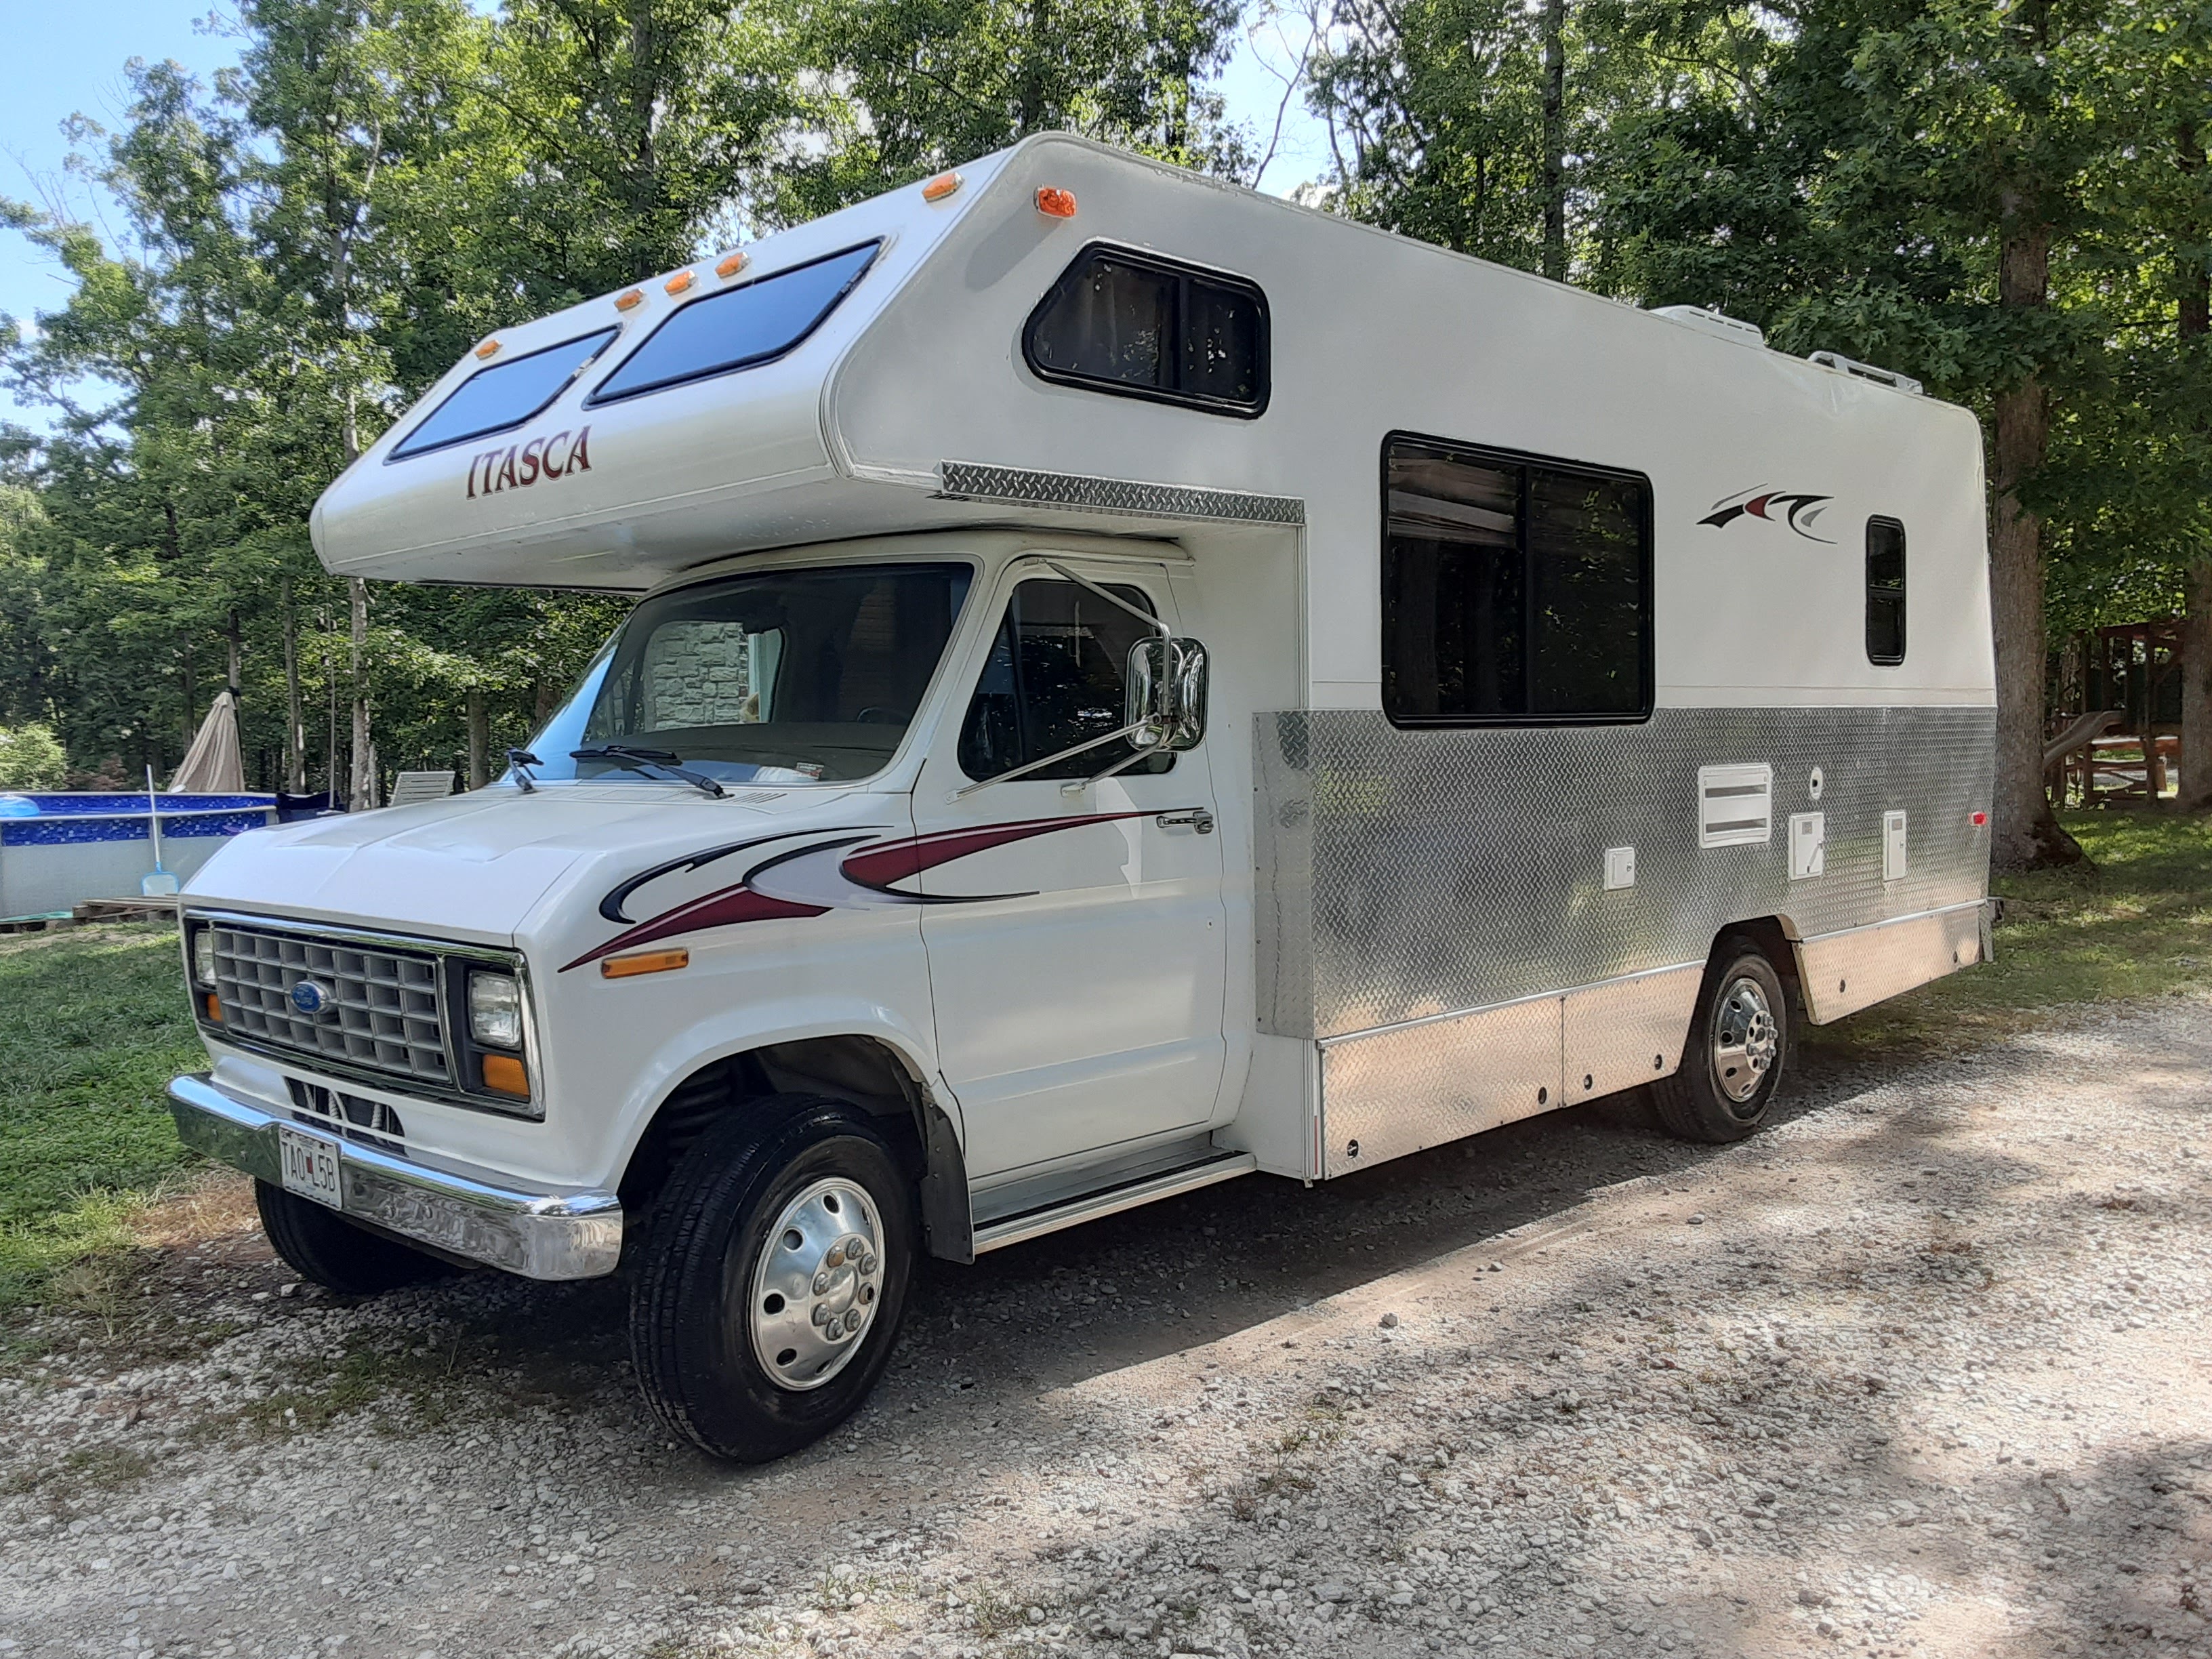
This was our journey rebuilding a 1990 Itasca class C cabover bunk
Shortly after the purchase, water damage was found and a rebuild of the bunk over the cab was inevitable.
Well, here we are!
TIP: Take plenty of pictures from all angles before you begin and as you remove parts. This best practice saved me several times when I could not remember how certain pieces were attached.
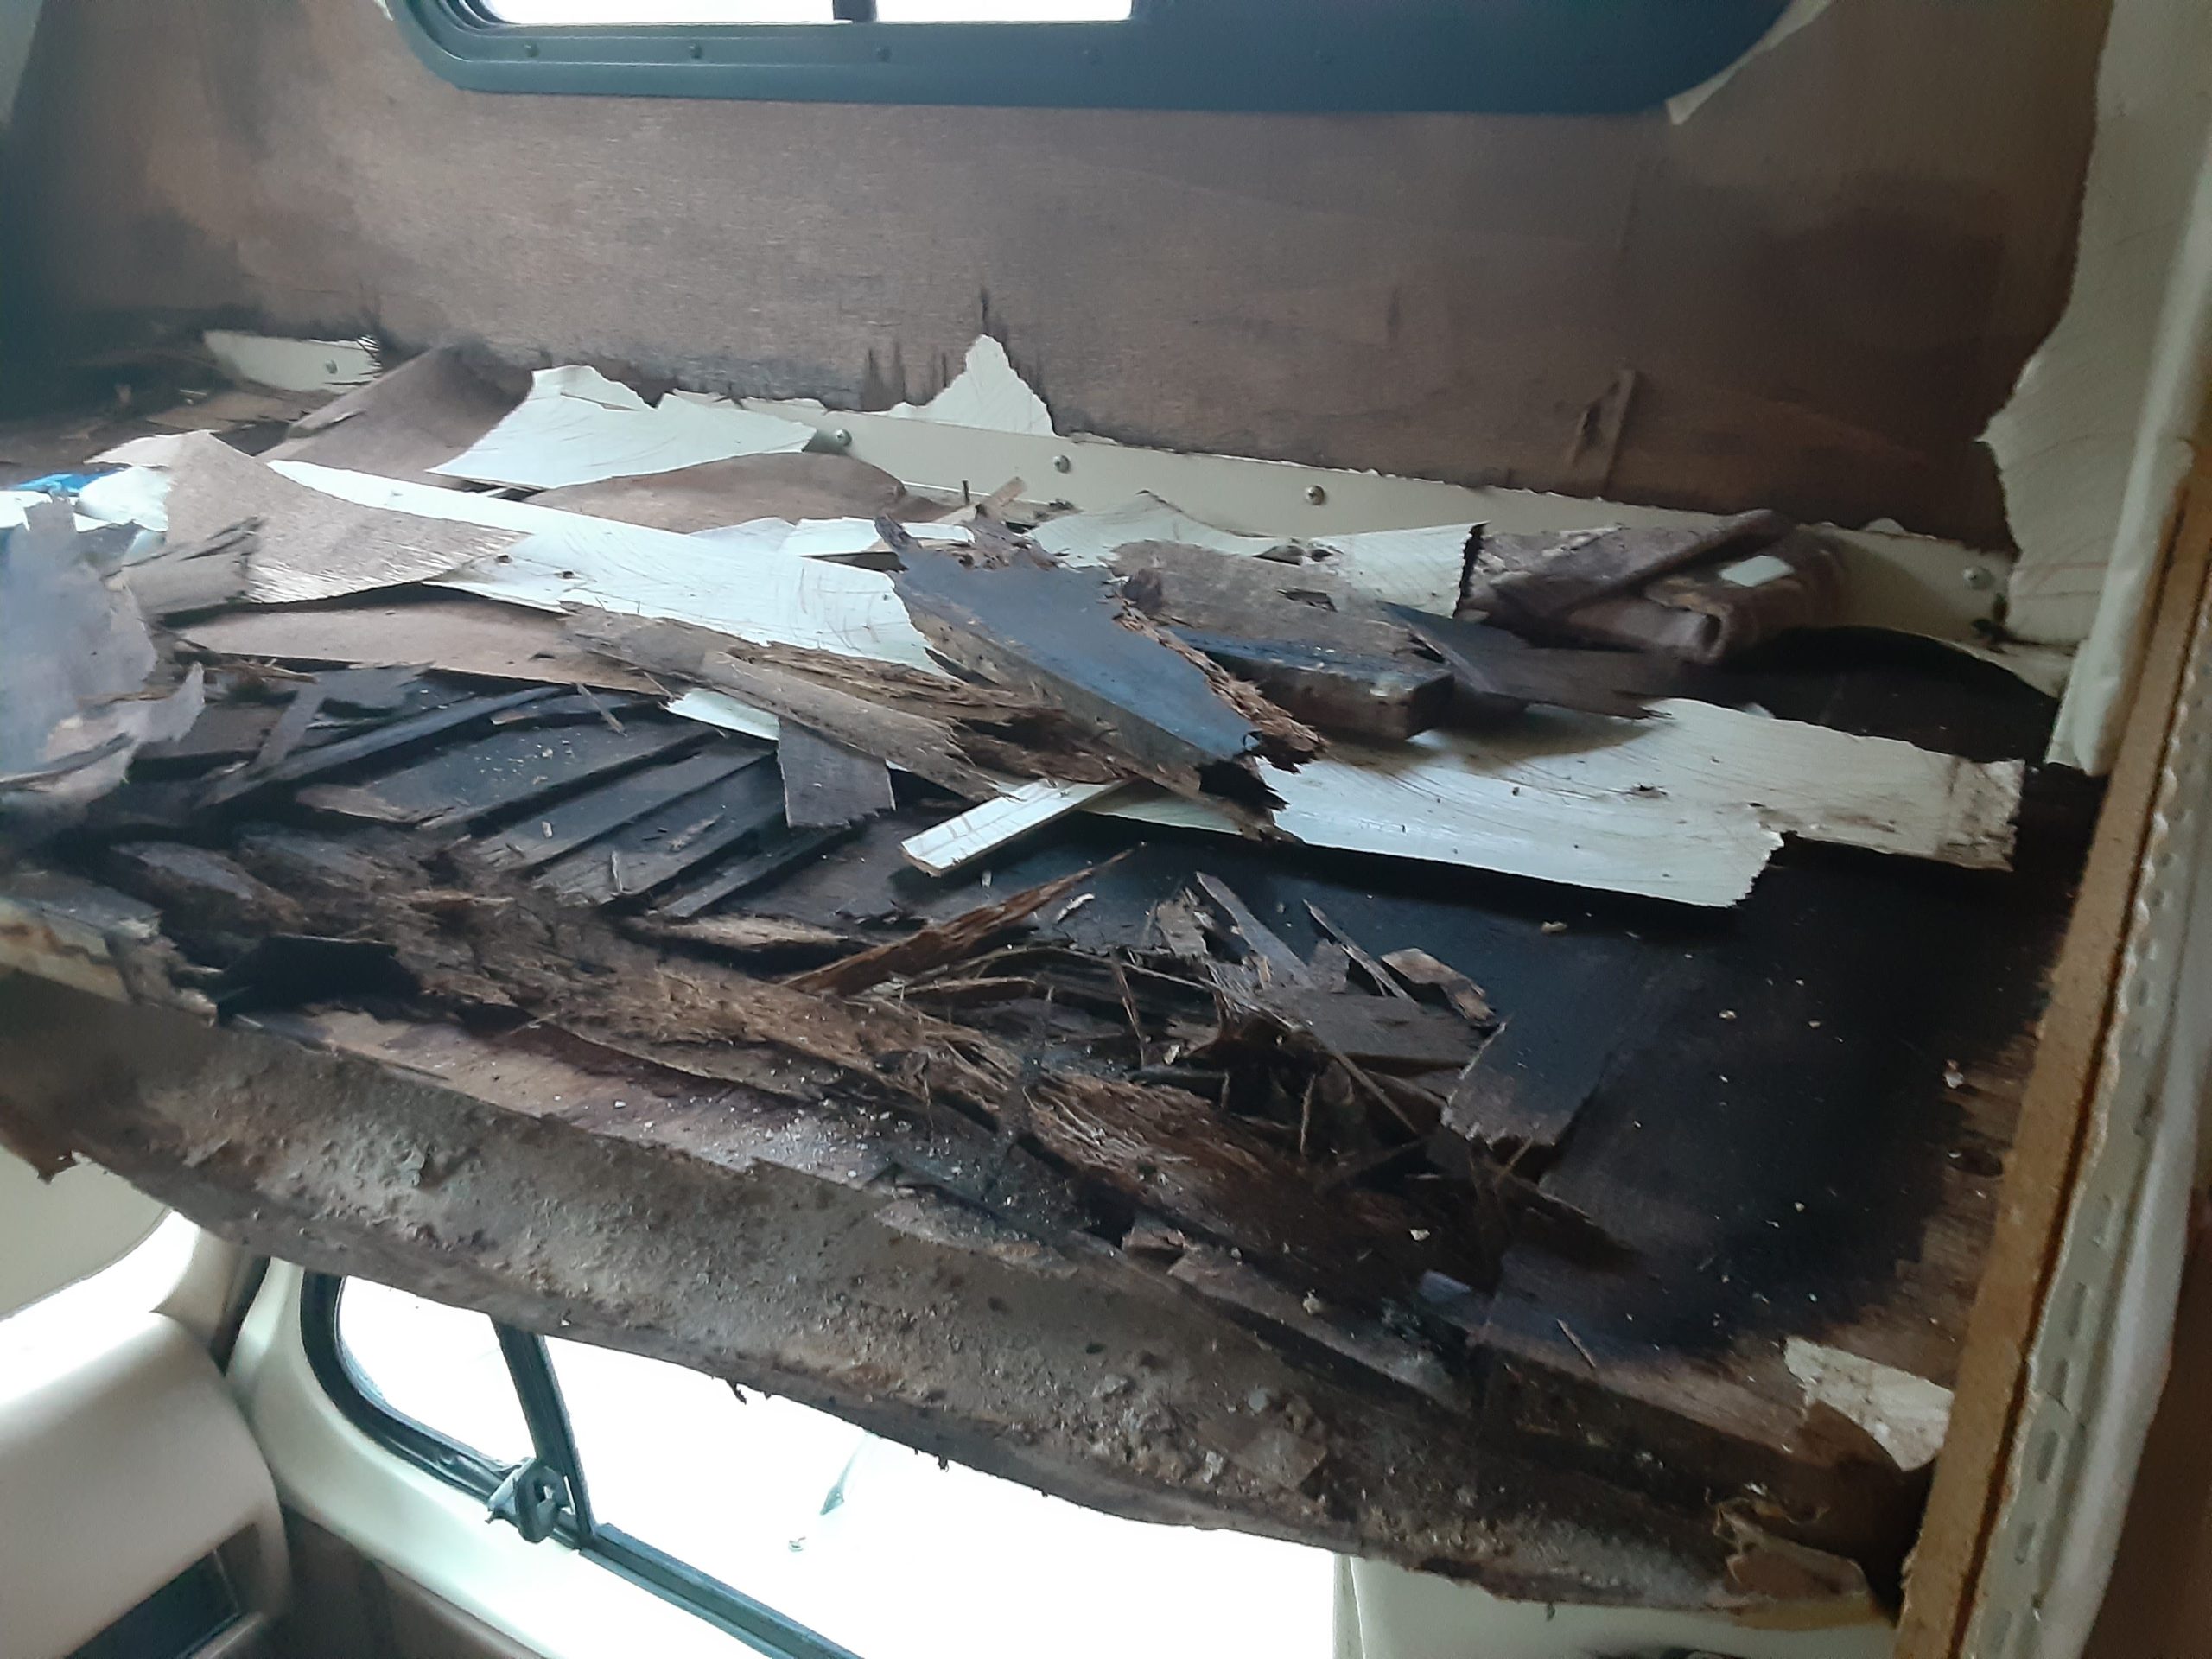
Not exactly what I was expecting when I bought my first class C, but I knew there would be some water damage. They all have some sort of leaks, especially in a 30-year-old model. I saved everything and tried to remove it as a whole as possible. This was done for any measurements that might be needed when rebuilding (curves, angles, and such). This is the messiest part of rebuilding a class c cabover bunk.
First I looked at the task at hand, and before starting I tried to research this process of an RV over cab rebuild. Upon looking I found very little information and hardly any pictures to assist me. This is the main reason I wanted to document my steps and what I found. This is definitely a DIY class c cab over rebuild and in no way am I claiming to be an expert. I thought anything I could provide from my experience, might help the next person feel a little less overwhelmed.

Tearing it down
I carefully removed the first layer which I discovered was totally waterlogged
Tip: Save any salvageable pieces as you are removing them from the damaged area. These pieces can be used as templates in some cases that make this RV rebuild so much easier.
This particular model 1990 Itasca only had a 3/4 in layer with a few thin layers of some kind of fiber paper on top and bottom. No insulation at all which surprised me a little.
I was really curious how this actually held a weight of any kind. I was expecting to find a little metal framing to account for weight distribution or something. Nothing!
I used a wide putty knife to slowly scoop away waterlogged debris and work my way down to the skin. Just go ahead and bring in a large trash can or box to throw material in as you go. Make sure when rebuilding a cabover bunk, that you take it all the way down and see what you are dealing with. Water is very sneaky and this is the last thing you want to be doing twice.
Once you tackle this mess and are ready to make your RV a home – here are some ideas

Down to the skin finally and cleaning the surface up
Tip: Save any nuts, bolts, and screws that you remove as a reference when purchasing new ones. I use stainless steel screws in any place that had a chance of being exposed to the elements.
Once I carefully removed the first layer from the RV cab-over or only layer of wood there seemed to be a thin layer of laminate glued to the metal skin. When cleaning this up I used a couple of different sized putty knives to slowly remove the laminate.
I clean off as much as possible without damaging the skin and found a few rust spots on the skin.

I think it looks worse than it actually was, or maybe not. Just take your time and be careful not to make any more damage than you already have. I planned to reinforce later to make sure there were no moisture penetration areas. The outer skin that I was attaching would just sandwich this thin layer also, so removal was not necessary.
Needed Supplies

When rebuilding the cabover bunk, I sprayed all the metal with a rust converter to protect and strengthen it. 1×4 wood strips were replaced on sides that were screwed into the metal frame and then allows for the skin to be screwed into the wood. make sure screws are long enough to go through the skin, 1×4, and well into the metal framing.

Assessing the project and preparing to rebuild
My next step was to access my progress and map out my rebuild. Everything needed cleaned and prepped for reconstruction. On the support frame, I used a rust converter to renew and protect it from future damage. The Rust converter can be found on Amazon for around $15 a can – Check here
As you can see from the top picture I had to remove the exterior trim channel to gain access to screws and remove the remaining debris. This may seem scary but if you take your time it should screw right back into place once you get your new frame bolted in. Take plenty of pictures before and during the whole process for reference when needed.
The L side-channel support was also treated for rust, painted, and replaced. I then place the new frame board into place, bolted it to a metal frame, and reattached the skin.

Several large spots with major rust damage
Not expecting this!
I found several large spots where the skin had rusted through and I will need to come up with a plan to address this. So, I decided to add an outer skin over the current one instead of removing it. This is most likely not best practice, but I was looking for the best solution without spending more cash than needed.
I believe pulling the old one completely off and starting with a new skin would be the best practice. For this project, it was just not practical due to the age of the RV and the return on investment. It is a 30-year-old RV that will only be used for a few years and I am sure I will find more things in need of repair.


Attaching new skin from outside
I chose to attach a vinyl sheeting on the outside that butts right up against the original outer skin. So, this vinyl piece was slid between the top of the RV cab and old skin. Used a construction adhesive to secure old skin and prevent any kind of movement. This piece will also be screwed along the edge when replacing outer trim pieces. I also ran 2 lines of screws across attaching to my over bunk frame that I built.


Starting to build out a frame
I coated any corroded areas with a rust converter and a marine-grade adhesive sealant to strengthen them. The frame was built from 1×3 wood strips. Construction adhesive and screws to secure. My thoughts were to caulk constantly as I replaced every piece. This may have been overkill but needless to say, I did it anyway.

The second layer of frame and bunk cutout
Tip: Adding a moisture barrier between the outer skin and the bunk floor can keep out unwanted condensation. Even if your bunk is not leaking it can still absorb moisture in the wood from the coolness outside and the heat inside.
For the bunk cutout, I was able to salvage enough original material to have a template for corners and edges. I used several pieces of metal 1×1 L channel to strengthen the frame.

Final Framing and Insulation
When I bought this RV, rebuilding the cabover bunk was the last thing on my mind. Turned out pretty well with never having experienced this type of project before.
I filled voids with 2 layers of insulation foam sheets to help reduce condensation. I also installed 2 supports with aluminum angle iron to help strengthen the RV bunk. Cross supports are attached to each frame piece.

Bunk cutout
Nearing completion, the bunk will get the remaining insulation installed and 3 pieces of plywood between cross supports to have a nice even layer ready for the mattress topper.
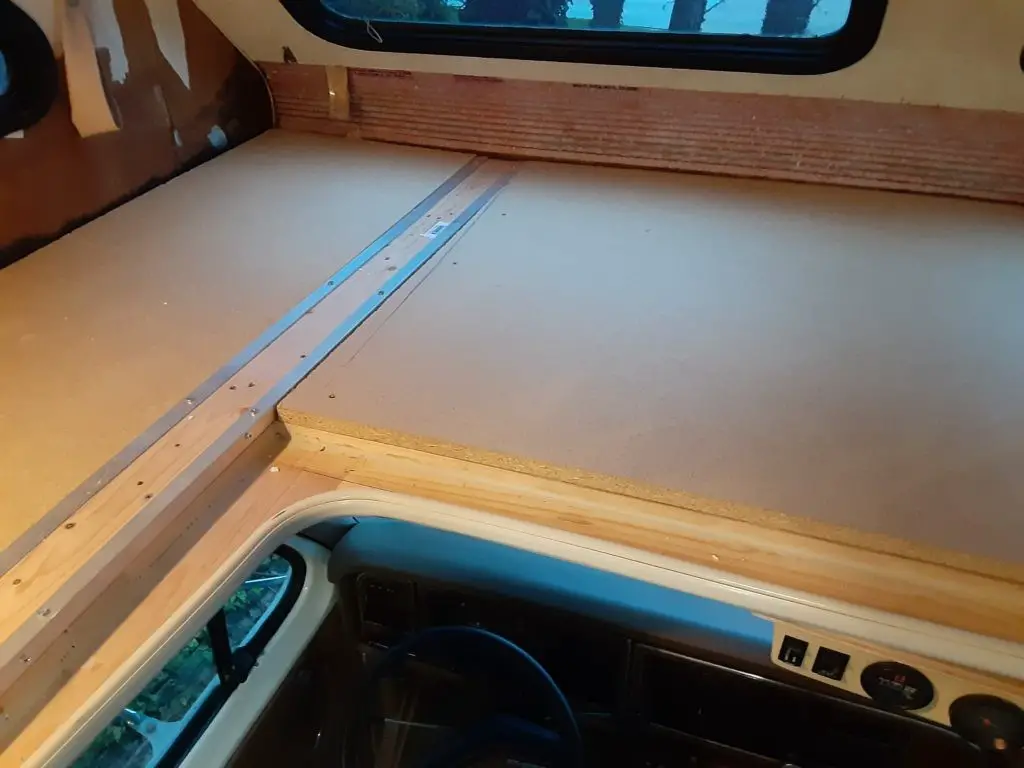
Well, this is ready for the mattress now
Tip: I added a cutout on each side that would pull out and let see between the layers. I check these every once in a while to see if there is any active water penetration.
A new mattress and cover have been ordered and should be a strong cab over bunk once completed.
Now that the bunk is done, I need to repair a few small damaged spots on the walls and paint or wallpaper.
Completed pictures coming! Was going to let it see a little weather first.
Shop here on Amazon for supplies needed to complete your RV repairs

Update
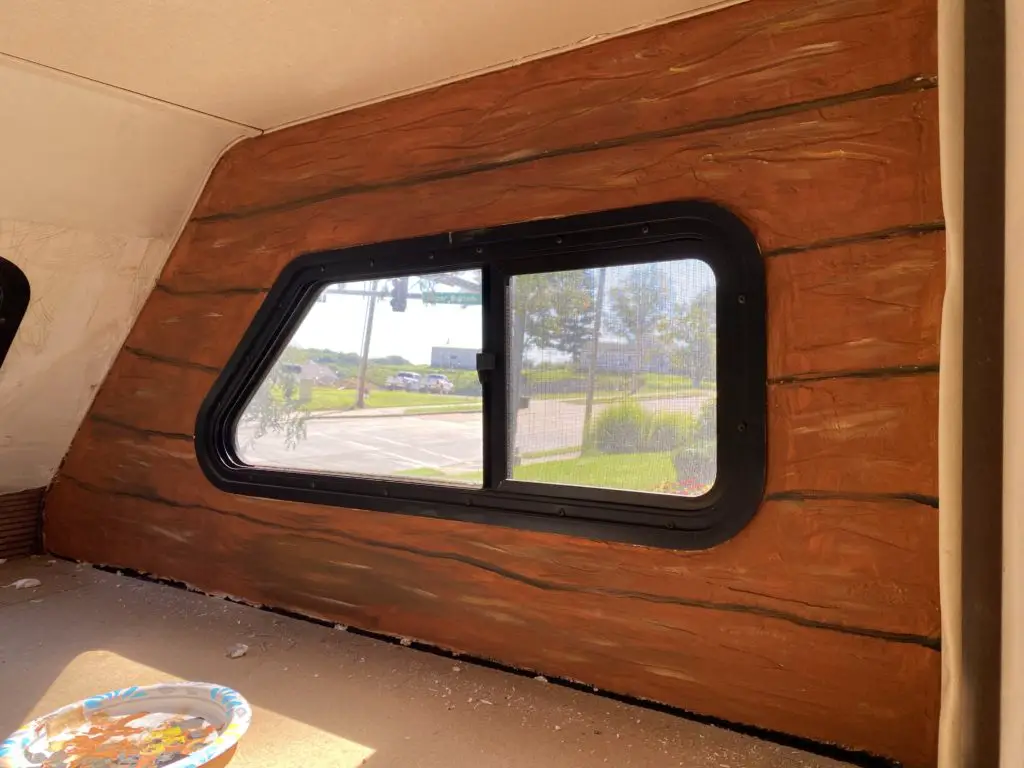
For the side wall, I did a little texture work due to minor damage from the rebuild. I then added some faux paint techniques to help it blend in and conceal any imperfections.
We have since replaced the mattress and have taken it out on a couple of adventures. It really feels solid when I get up there and sleeping in it is not half bad.
Conclusion
Unfortunately, This is a common issue with Class C RVs and I am sure has been done many times by people over the years.
When you are searching for a used RV with an over bunk inspect it thoroughly. There was no visible damage on mine when I looked at it, but now am much more aware of things that are red flags.
I will add a couple of final pictures this spring once I get the bunk sleep ready.
Just take your time and watch how you take it apart. I suggest taking pictures as you go to remember how it was originally put together.
It was a lot easier than I thought it would be, but I am in no way an expert. I’m sure I could have done better if I spent a little more time and cash on it.
Items used for rebuild
4×8 Vinyl Sheet I picked up at Home Depot
Styrofoam Sheets for insulation
Stainless Steel Screws You will need a variety of sizes and most likely will be different from mine. just save the ones you remove and size them up accordingly.

Comments
2 responses to “The Ultimate Guide for Rebuilding a Cabover Bunk”
Wow, this is great, Brian!! Thanks.
When’d you post this and do you have more photos?
I’m hoping I don’t have to rebuild my 1988 Tioga Arrow cabover platform!
Do you think drilling some holes in it would suffice to assess it?
I finished this up last fall and really was not planning to post it at all. It was much an afterthought, so those are the only pictures I have unfortunately. I made a couple trap doors so I can pull them out and check to make sure it is staying dry. Drilling holes would help large amounts of water to drain but the water will soak into things before it all drains. Then it will not be able to dry properly.